

Quick Tips for Fixing a Leaky Garden Hose Yourself
Do you have a leaking garden hose? Before you toss it out and buy a new one, you may be able to repair the problem. Try these easy tips.
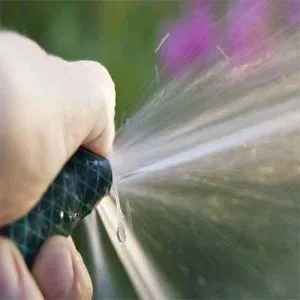
How you go about fixing the problem depends on where the leak is located.
Leaking Bib Connection
The bib is the faucet where you attach your garden hose. If there’s a drip coming from behind the faucet handle when the water is turned on, the trouble is probably a loose packing nut. The packing nut is the hex nut behind the handle that holds the valve assembly in place. With the water turned on, slowly tighten the nut with a wrench until the leak stops, being careful not to tighten it over, as this could cause some damage.
The another possible problem is if water continues to drip from the tap when the faucet is closed. If this happens, you will need to change the washer inside the hose bib. First, shut off the water supply to the bib. If you don’t have a dedicated shut-off valve for that outside faucet, you’ll have to turn off the main water supply for your home. Open the faucet to bleed the water out of the system and remove the valve assembly by loosening the packing nut with a wrench while holding the valve body with channel locks. At the end of the stem, you’ll find the washer that needs to be changed held in place by a screw. Remove and replace it with a new one of the same size.
Leaking Gaskets
 If your leak is coming from the connection to the tap or a link with another hose, you probably have a worn out or missing gasket. The gasket is the flat washer inside the hose connector. We recommend replacing old gaskets with an O-ring as these provide a superior seal.
If the connector is still leaking, it may be necessary to change the hose end. Purchase a hose barb kit at your local home improvement store. Cut the end of the hose off with garden shears and slip the clamp onto the hose before inserting the barb into the hose. Place the clamp in the middle of where the barb is located inside the hose and tighten it with a screwdriver.
Holes In The Middle Of the Garden Hose
 To repair holes or tears in your hose, you could use rubber cement or a tire repair kit, but we think the most effective fix is to buy a hose repair kit. These require first cutting out the section of damaged hose with garden shears. The kit should include two O-clamps and a coupler. Slip an O-clamp onto one end of the hose and insert the coupler into the hose. You may need to use some dish soap to lubricate the coupler. Tighten the clamp over the coupler with a screwdriver and repeat the process on the other end of the severed hose. Connect the hose to your tap and turn it on to test the repair. If you see a leak around the coupler, you may need to tighten the clamps some more.
When you repair your leaking garden hose, you will not only save yourself the expense of purchasing a new one, and you’ll also be helping to conserve water, saving you money on your utility bills.
For more expert advice, or for any of your plumbing service needs, contact the professionals at C&D Plumbing in Fort Lauderdale, FL at (954) 758-8169.